Chair Sash Tying Tutorial- Double Wrap with Side Bow Chair Sash Ties
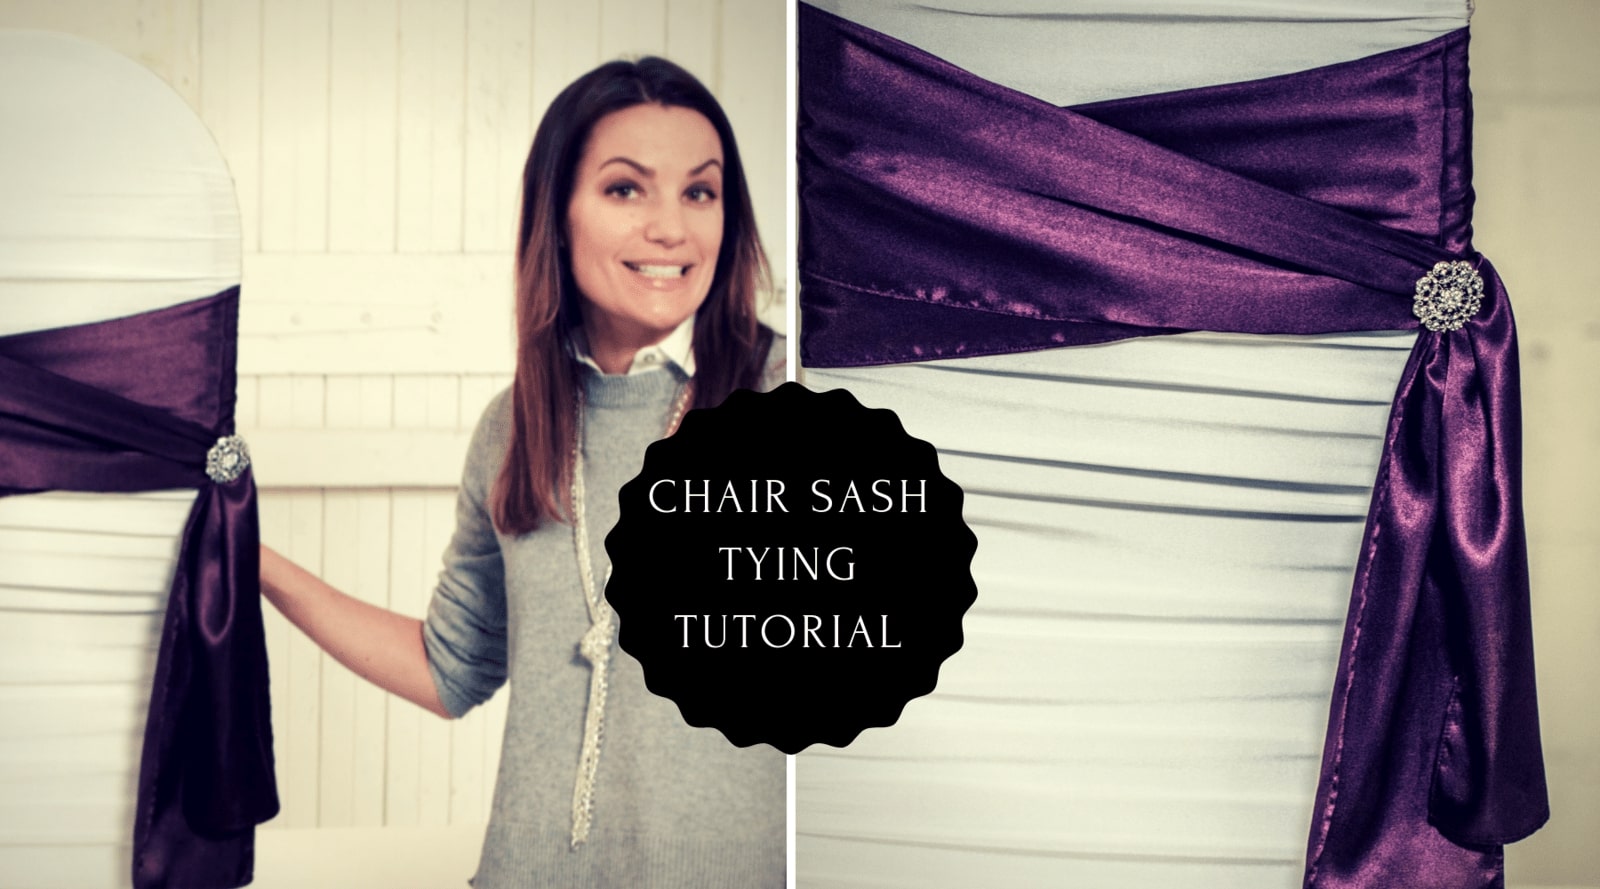

Learn how to do the double wrap chair sash bow with a side knot
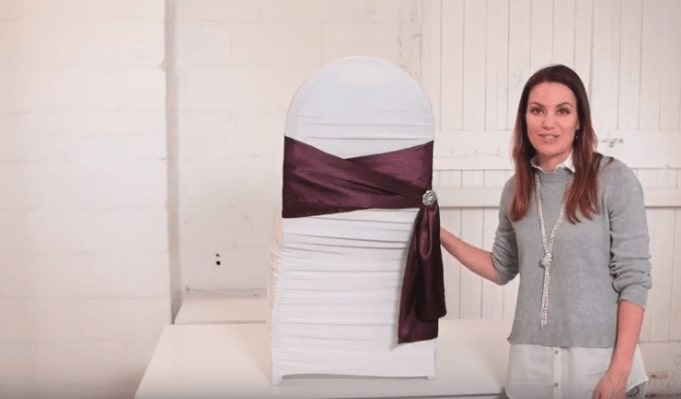
Creating wedding chair decorations doesn’t have to break the bank or be too difficult to do. I’ve got another super easy tutorial for you that leave your chairs looking like they are professionally styled and there’s no glue or sewing involved.
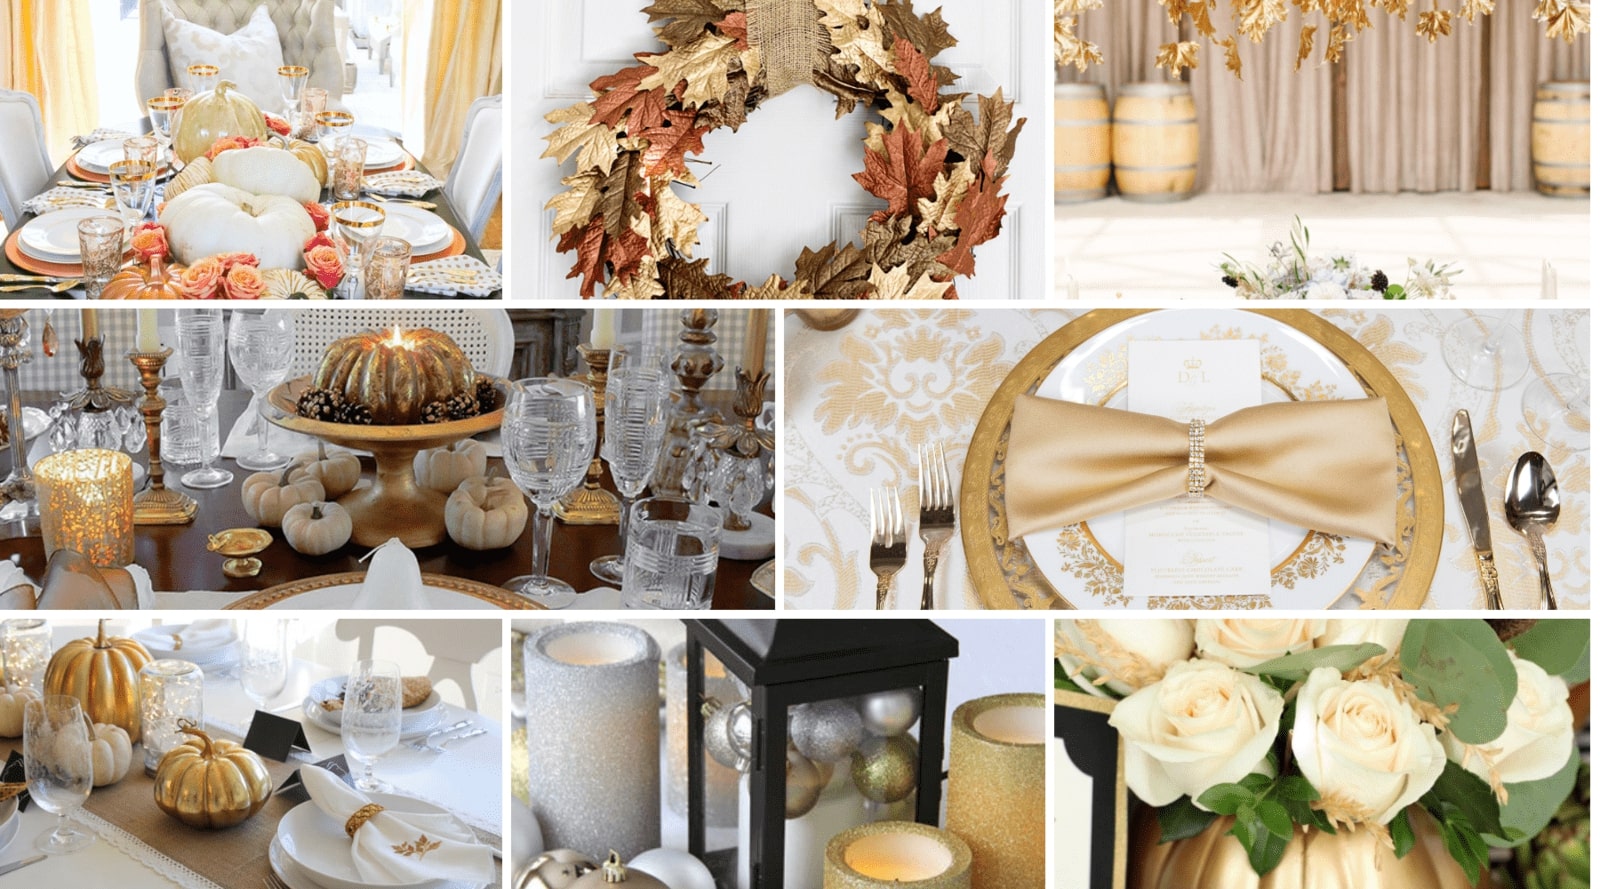
The secret to creating a beautiful and elegant chair sash design is in choosing the right tie method and the right combination of chair and sash material. Play around a little with the different options and see which one suits your needs the best. Here are some of our most recent chair sash tutorials, each one as lovely as the next:
- How to tie a vertical Chair Sash
- How to Tie a Flip Tie Chair Sash
- How to Tie A Diagonal Chair Bow
- How to Tie a Chair Sash Bow
- DIY Chair Sash Tying
- DIY Elegant Chair Sash
- DIY Tulle Flower Chair Bow
- How to Tie a Square Knot Sash
WATCH THE TUTORIAL
In order to make do this chair sash style you’ll need:
- A Chair – I’ve used a standard banquet chair with a stretched satin cover on in this tutorial video
- Chair Sash
- Your choice of Rhinestone Brooch – I’ve used the Diamante Flower Brooch
Kicking this tutorial off, start by folding your sash so you can find your center point. Wrap it around the chair and bring the ends to the side until they are equal.
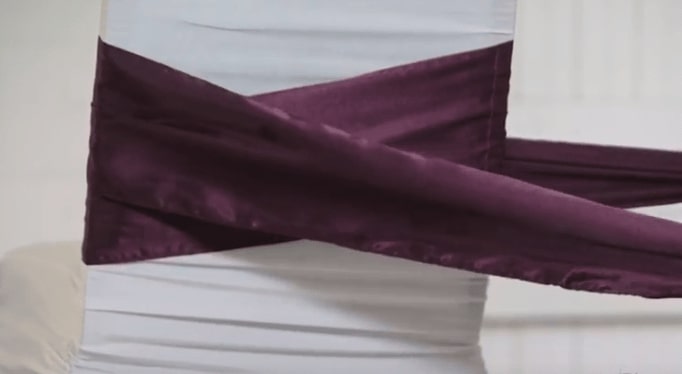
This is how a double-wrap should look like. Next, tie the ends of the sash to a simple knot on the side.

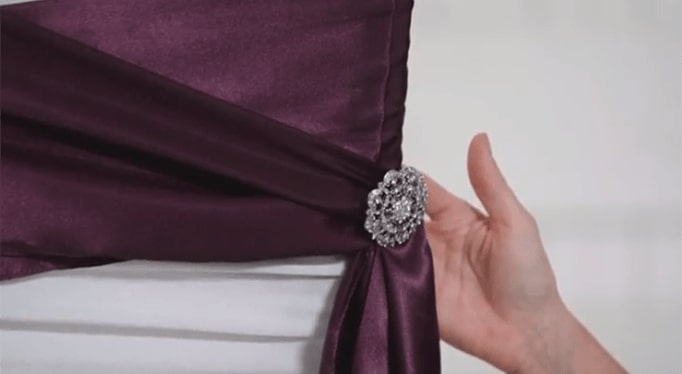
Pin on the rhinestone brooch of your choice. I am using the large silver Diamante Flower Brooch in this video. Look at how the silver brooch and the purple chair sash complement each other!
This is one of the easiest chair sash tying methods we have ever tried and you could easily do this on a large number of chairs.
That's it, it's that simple.
A few quick ideas:
One of my favorite ways to spruce any chair design up is to add bling but you can certainly add other elements to the knot along with the bling too. A feather, a special floral element, a gorgeous bow. Anything that will suit your event’s theme.
Have fun while you make this DIY and remember that you can get totally creative with the materials to really make it yours and totally awesome.
We’d love to see your chair sash tying output, don’t forget to share your projects with us on Instagram using the #totallydazzled hashtag. Also, if you’re a big DIY fan (like me) head on over and subscribe to our Youtube Channel for more awesome videos like this one.