DIY Napkin Ring Wedding Décor Tutorial
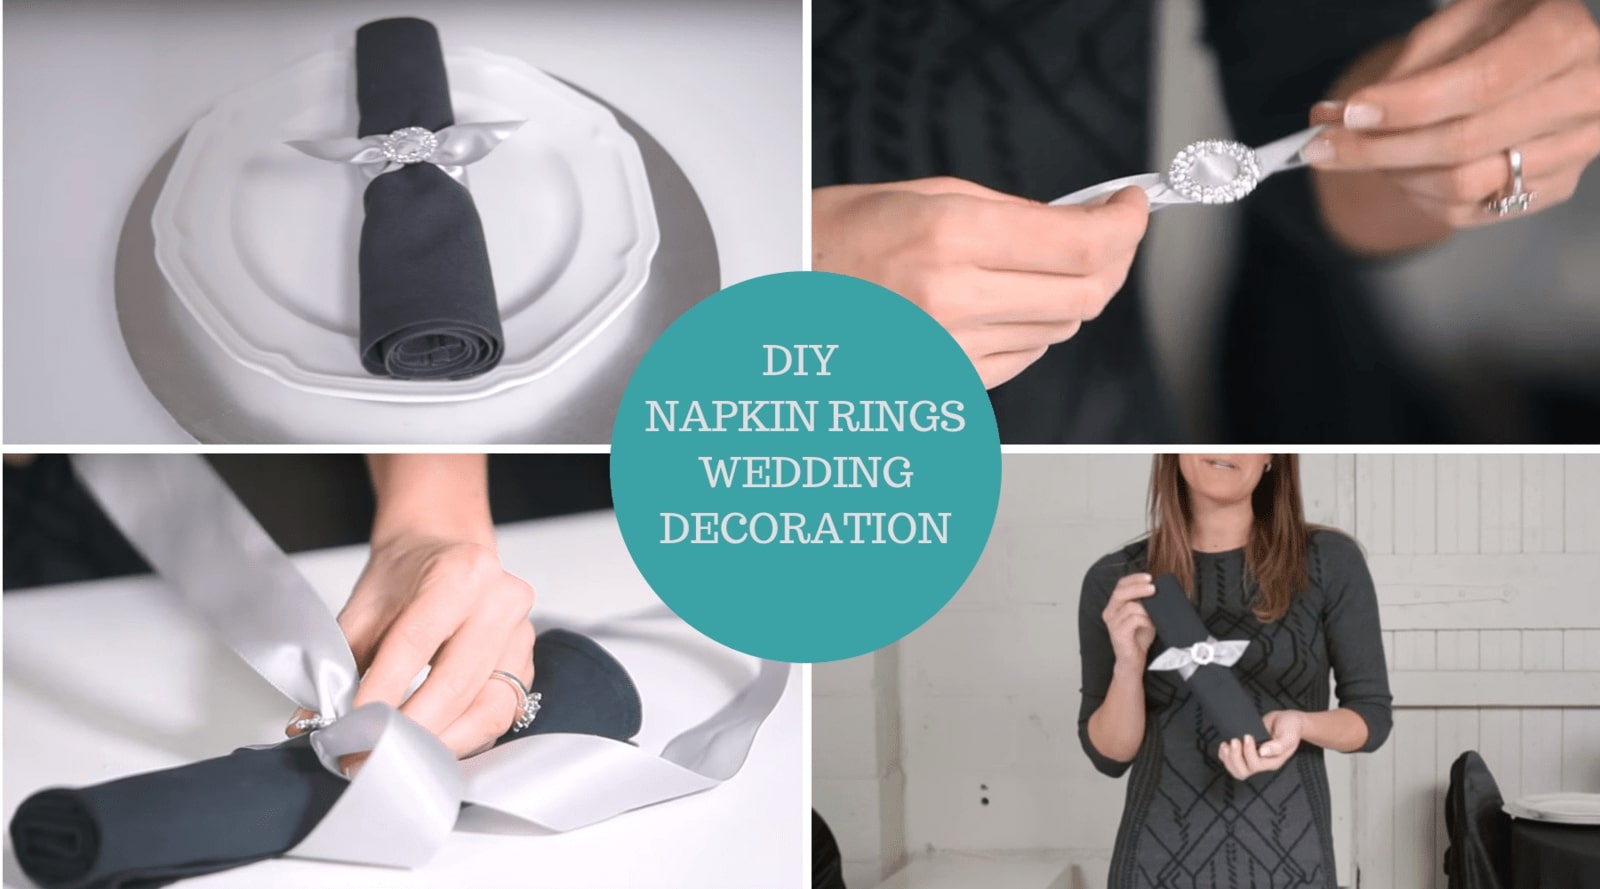

Make these stunning napkin rings yourself.
Napkin rings may seem like a small and unnecessary detail at an event or wedding but so very often it’s the napkin ring that adds the final and most important touch to the table setting. There are, of course, so many elements that make an event table spectacular so it doesn’t just come down to this one feature but from my own experience the smaller details that work together as one is what makes an event, it’s décor and design, and the moments really memorable.
This DIY napkin ring tutorial is the second version of our previous one and it’s another wonderfully easy yet glamorous project that will add a lot of sparkle to your tables.
In order to start with this DIY napkin ring project you’ll need:
- A Napkin
- Your choice of slider buckles, I’ve used the Double Diamante Circle Buckle In Silver for this project
- A pair of scissors
- A length of ribbon. Note that for ease of use and for an extra glamorous feel, you could use double-faced satin ribbon so that both sides have that lovely shine to it.

The napkin itself is simply rolled, the ribbon and buckle slide adds the finishing touch to this project. It shouldn’t take more than 2 or 3 minutes to make one and absolutely no glue is required for this project which means that when you’re done with your napkins, you could disassemble the napkin rings you made and use both the slider buckles and the cut length of ribbon for other projects.
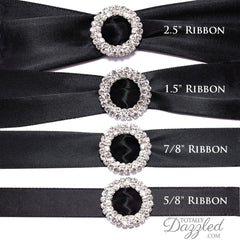
I often mention in these tutorials that if you want a slightly different look and feel to the look of your napkin ring, it can be achieved by simply using a wider, or thinner ribbon. See the table for an example of the difference the width of the ribbon makes.
Quick inspiration:
- It almost goes without saying that simply using a different slider buckle here can completely change the look and feel of your project. If your wedding leans towards a vintage theme, consider using the Crystal Buckle Slide or the Interlinking Circle Slider Buckle. For a religious themed event, you could use something more specific like the Star of David Rhinestone Slide Buckle or Golden Cross Rhinestone Slide Buckle.
- I’ve used a lovely satin ribbon with a gorgeous sheen, however, changing the texture of the ribbon will completely change the look of your slider buckle. Burlap, Lace, textured ribbons all work well as napkin rings and each one has its own character. Play a little with different ribbons and colors to achieve the look you’re going for.
- If you don’t want to alternate the ribbons for a different look, try using a differently textured or colored napkin. High-contrasting colors look great but so do muted color combinations and complimentary color combinations.
I almost always enjoy the process of figuring out what to use where and how to combine elements more than the actual making of the project. Go ahead and have fun and remember that great event planning and decor design doesn’t have to cost the world to be super gorgeous.
We’ve got more DIY tutorials like this one, head on over to our Youtube channel and subscribe for updates and new videos.