Your Cart is Empty
DIY Napkin Ring Tutorial Wedding Decoration Ideas

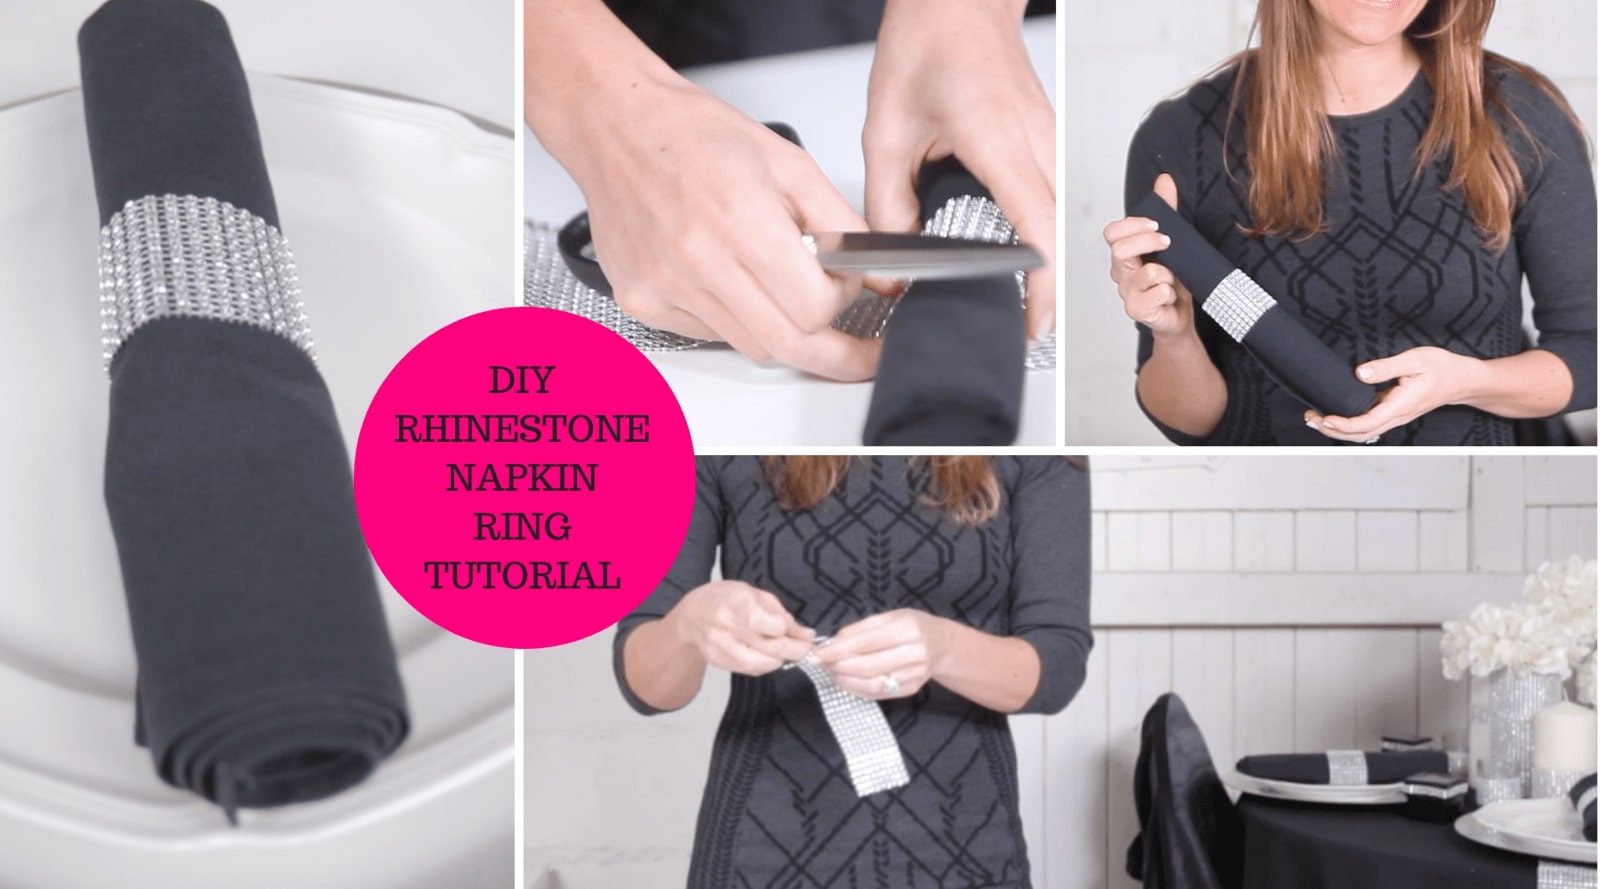
Make simple yet elegant napkin rings in no time at all.
A DIY napkin ring is a great way to add something extra to your event table settings that people will remember. A beautiful napkin ring not only transforms your table but it sets the tone for your photos, making images of your table settings complete. But we know how expensive details like napkin rings can be, especially if you’re planning a big event.
DIY’s are a great way to save money and have an active hand in your event planning but they can often be tricky and time-consuming. Weddings, big birthday bash, and another life event parties can rack up quite the bill. It’s always the finer details that really pull a good design together and so often it’s the finer details that are omitted when it comes to budget and time saving.
I love the finer details in projects and I’ve made it somewhat of a mission to find ways to create finer details that don’t impact an event budget too heavily and as a bonus, take so little time to make. The easier, the better. Of course, skimping on glamor is definitely not an option. That’s how this DIY napkin ring tutorial was born.
In order to make your DIY napkin ring you’ll need
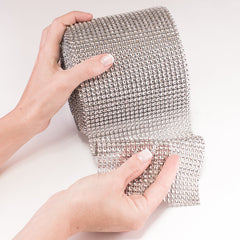
- A napkin of your choice, any color will do (I’ve chosen black as the Rhinestone Mesh contrasts well with the dark color of the napkin).
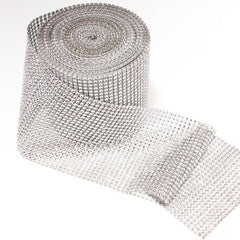
- A length of Rhinestone Bling Wrap Ribbon (also known as Bling-On-A-Roll)
- A pair of scissors
- Velcro strips (to make it really easy and even more cost-effective, opt for Velcro strips with a sticky backing)
The Rhinestone Ribbon is super simple to use and the mesh design makes it easy to cut into shape without intense measuring. Its versatility also means that it can be used in a number of ways, ensuring that almost nothing is wasted, nothing if you have a number of projects you’d like to embellish with the rhinestone mesh. And that’s the real beauty of bling wrap – it’s so multi-faceted that you can use it in a number of your event projects (even storing it for later projects or re-using it after your DIY napkin rings have served their purpose.)
Quick inspiration
- Simply change the look of the napkin ring by widening or thinning out the width of the length of rhinestone ribbon.
- It’s so easy to add your own touch to this project by slipping a flower, a special note, a name card or any other design element of your choice into the napkin ring.
- If you have lengths of Rhinestone mesh left over, embellish other items so as to not waste any of the mesh. Like DIY rhinestone table runners, bling candle holders, and beautiful sparkling chair sashes
- DIY napkin rings can be used over and over again. Keep your napkin rings neatly stored away for future dinner parties, events, birthday bashes and so much more. The rhinestone is flat so it won’t take up much storage space.
As always, have fun making creating your DIY napkin rings, be creative, and let the sparkle in you take over! We’d love to see your projects so if you want to share your DIY with us don’t forget to use the #totallydazzled hashtag on Instagram.