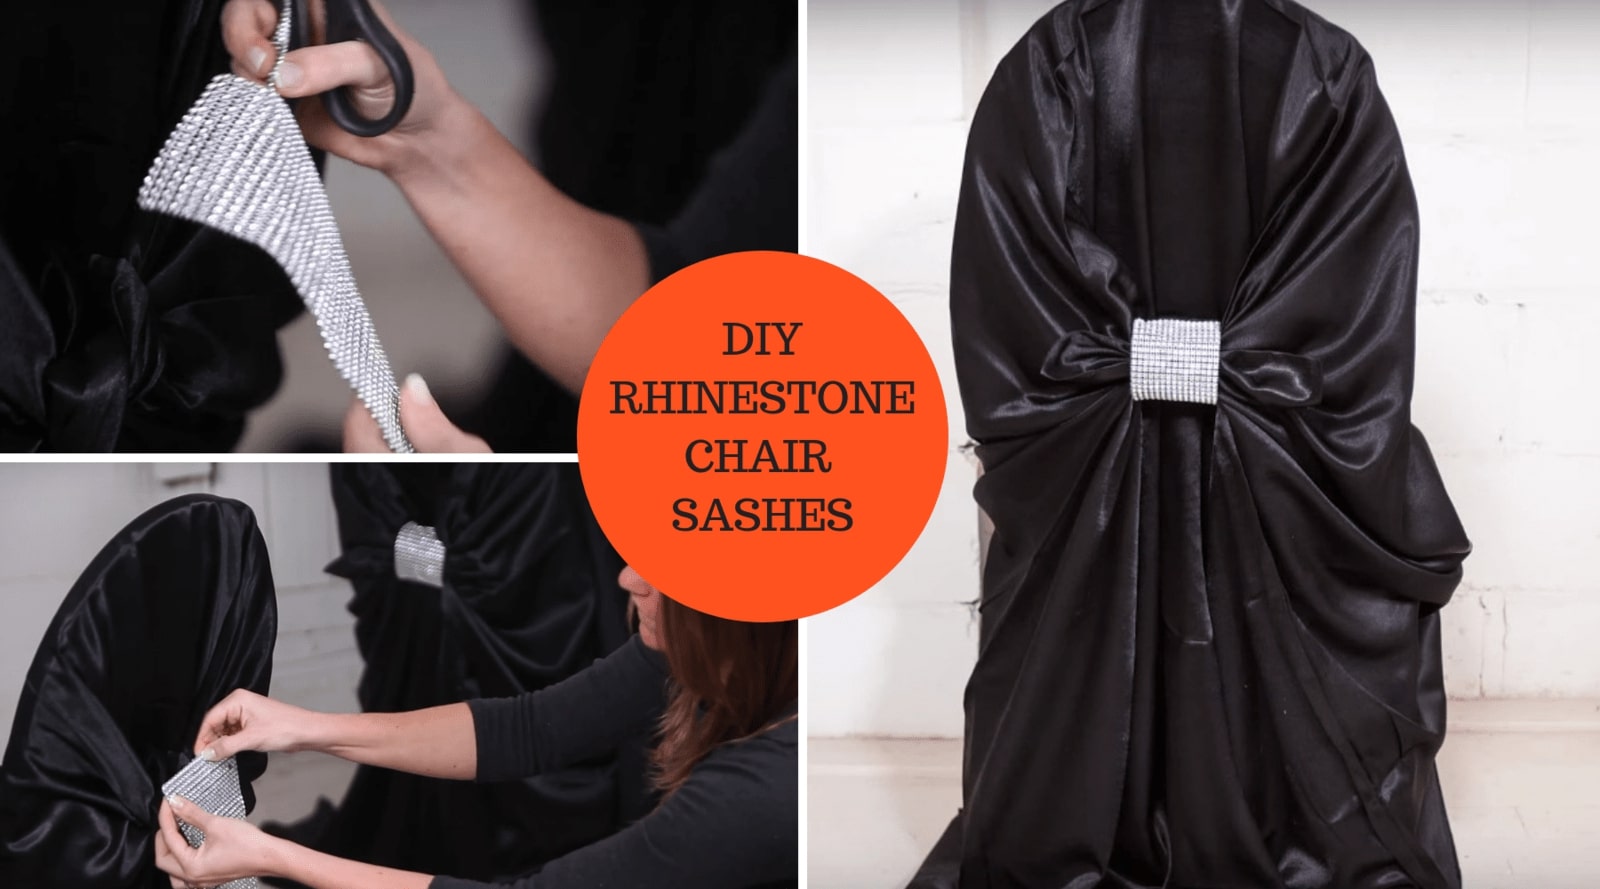
DIY RHINESTONE CHAIR EMBELLISHMENT TUTORIAL

Every bride and groom hopes to ensure that their guests are seated comfortably and in sheer luxury during their wedding reception. It’s all part of the experience and the memory that will become “the most important day of our lives”. For most, luxury is synonymous with splurging but it really doesn’t have to be. Sometimes the small details which add spark to any project are not as expensive as one would think, especially not if you’re making it by hand.
So, we bring you another fantastic multi-faceted DIY wedding décor tutorial. This project is relatively simple to make and uses our very affordable, durable, lightweight and brand new product – the nifty rhinestone mesh ribbon. So if you want to add sophistication and beautiful highlights to areas of your wedding plan (in the case of this tutorial, it’s the wedding chairs) then this DIY wedding project is going to be right up your alley.
In this DIY rhinestone chair embellishment tutorial, we show you just how easy it is to create your very own stylish and professional chair sash buckles using our gorgeous mesh ribbon.
Here’s a list of the items you’ll need before you start your project:
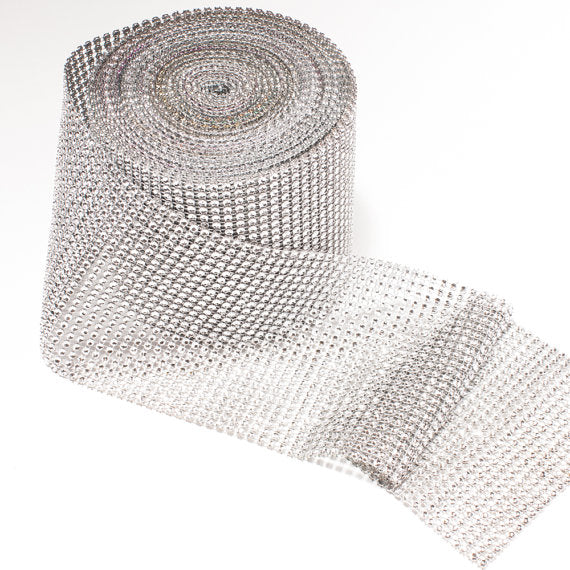
- Our beautiful sparkling rhinestone mesh ribbon, also known as bling-on-a-roll. The standard size is 4.5 inches wide x 10 yards long
- A pair of long blade scissors to provide quick cutting
- Velcro strips with a sticky backing or regular Velcro strips glued on with a strong glue like E6000 (available at any craft or fabric store)
Unroll the rhinestone mesh ribbon and measure the width to match the sash collar where your chair embellishment will be. The width of the rhinestone mesh cutting will depend on three main things; the chair that you use, the chair cover and the sash that you are embellishing. Cut the mesh to your desired width and wrap it around to get an idea of the required length. TIP: You might want to add half an inch of overlap where we will be adding the Velcro backing.
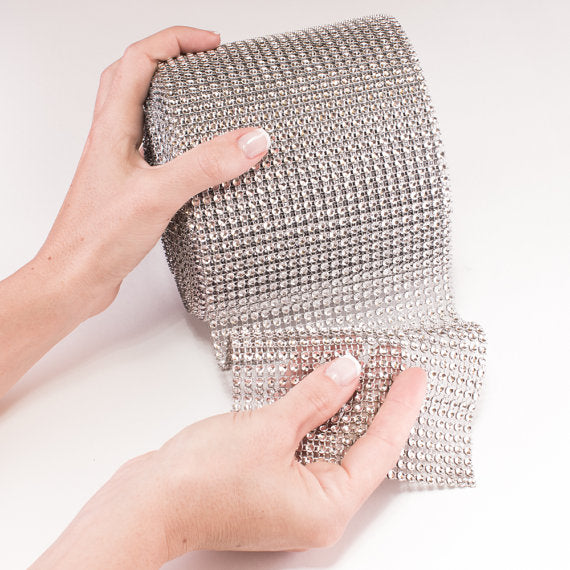
It’s far easier placing the two Velcro pieces together and measuring it to the rhinestone’s mesh ribbon width before cutting. This ensures that the two pieces are perfectly sized and line up well. Although the Velcro is wide and it would not really show, I recommend cutting it in half down the length to give it that pretty and elegant look. That way you not only save on cost but also get more out of your Velcro. (This will come in handy if you have many guests which, of course, equals many chairs.)
Separate the Velcro and peel away the sticker backing or apply your E6000 glue. Be sure to put one piece on the shiny side of the rhinestone mesh ribbon and the other on the dull side of the ribbon to ensure they connect when overlapping. Once connected turn the chair sash buckles to place the Velcro-enclosed piece at the back. And there you go, super easy and {totally} awesome!
We’d love to hear from you regarding your thoughts on the new rhinestone mesh ribbon. Was it easy-to-use, what did your guests say, how and where did you make use of it? Looking forward to the comments.